
Where To Install a Mini Split Condenser (Wisconsin Tech Guide)
A Wisconsin HVAC tech explains where to put mini split outdoor unit for longest life and lowest energy bills. Covers sun, snow, clearance, noise, and code rules.
- Written by
- A working HVAC tech
- Updated
Key Takeaways
-
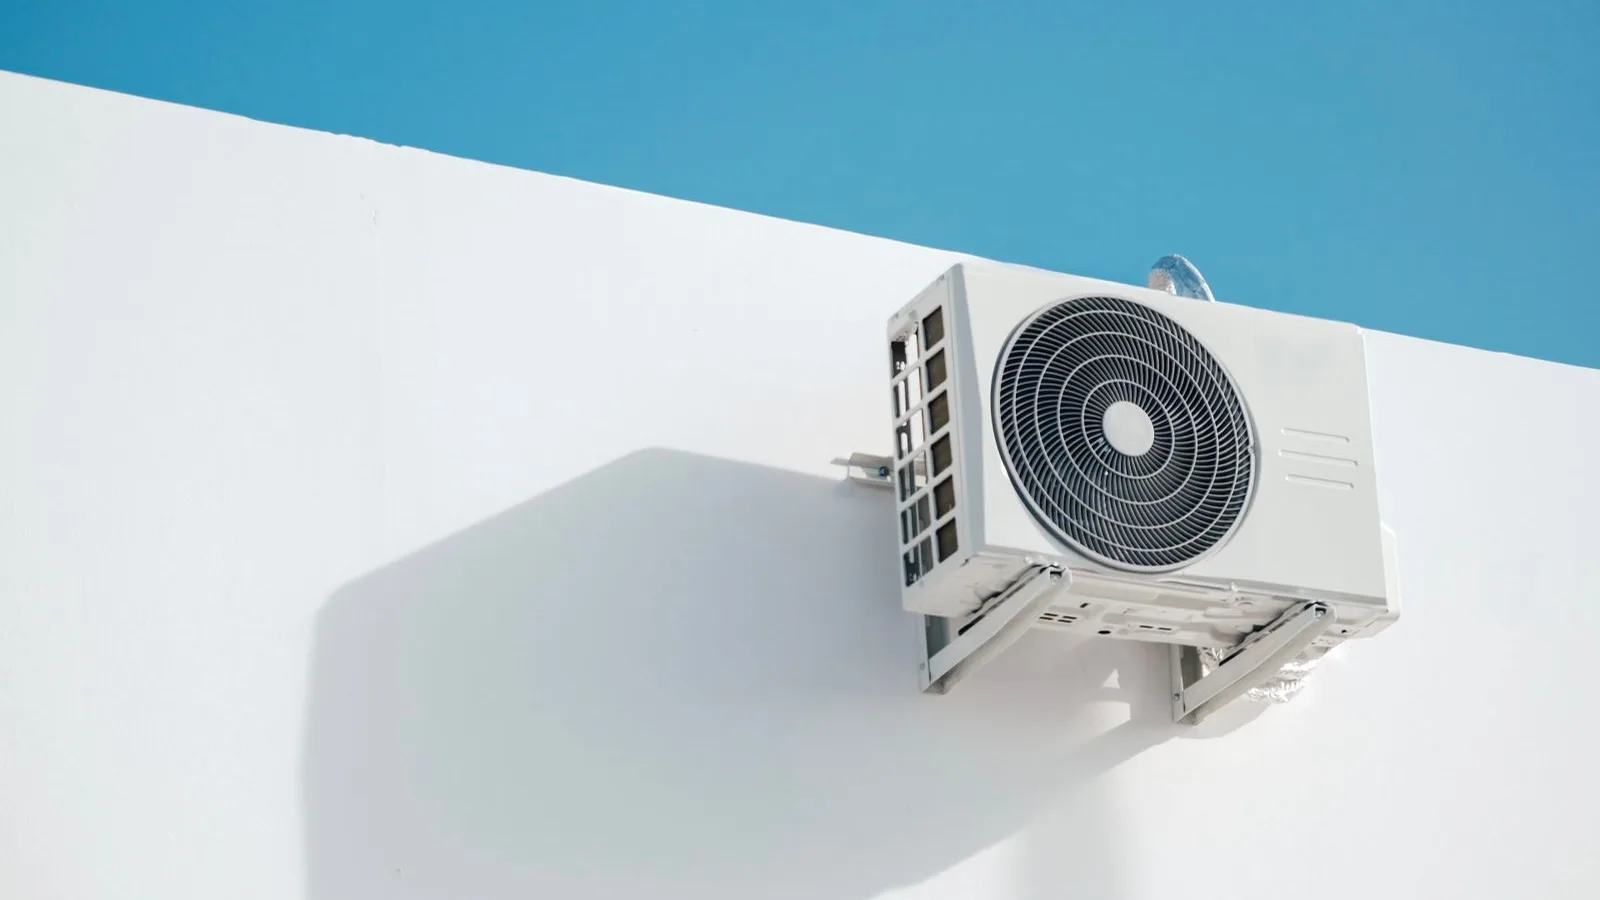
For most Madison, WI homes, I put the mini split condenser on a level pad or wall bracket on the north or east side of the house, in light shade, with at least 12 to 24 inches of clearance on all sides and clear space above.
-
Avoid spots where the sun hits all day, where snow piles up, where water stands or where space is tight. Where you put the unit is something that matters more to efficiency than most homeowners realize. Good placement can improve how well a mini split works by 20%, and a bad install can lose that same 20%.
-
Keep the condenser as close as practical to the indoor unit so the line sets stay short, but don't put it in high traffic areas, near bedrooms or tight property lines where noise or airflow could cause problems.
-
In southern Wisconsin snow country, I often use a pad with a stand or wall brackets so the condenser sits above the typical snow level and also stays away from blowing snow.
-
You can't start a mini split installation that needs a state uniform building permit until the permit is out, so the condenser location should be planned and set before that point.
Why Condenser Placement Matters
I install mini splits around Madison, Wisconsin, and the question I get asked most often is which brand to buy. The question I wish people asked first is where to put the outdoor unit. Where you install a mini split condenser has as much impact on long term performance and lifespan as the equipment itself. An outdoor unit baking in full afternoon sun pulls harder on the compressor, runs up energy consumption, and wears out sooner. One buried in a snow drift cycles through defrost mode until it trips on high pressure and stops heating altogether.
While many steps of mini split installation are DIY-friendly, choosing and preparing the outdoor location is an area where consulting a local HVAC tech who understands the climate and building codes pays for itself.
Best Spots for a Mini Split Condenser
Good condenser spots share these features:
-
Natural air circulation with no walls or structures that block the side where the air comes out
-
There's little direct sun, especially from noon on
-
There's protection from falling ice, water running off the roof, and areas where leaves pile up
-
Space away from bedrooms, quiet outdoor spaces and shared fence lines
-
There's easy access for future service and maintenance
Concrete examples for Madison: the north or east exterior wall of a ranch home, a patio slab that has a composite pad on it, or a wall bracket above a driveway that stays cleared. Proper mini split placement matters for comfort on day one and also for how the unit does in the long term, for service access, for noise and for future landscaping or deck projects. Even for a single room install, picking the right location is something that prevents uneven cooling and reduces the need for the unit to work too hard.
Clearance, Airflow and Shade Requirements
How much clearance does a mini split condenser unit need? Typical specs vary by brand:
-
You need at least 12 to 24 inches of clearance on the sides and rear from walls, fences or obstacles
-
Keep at least 3 to 4 feet of clearance around the unit on the fan discharge side (some brands, like GREE, specify 6.5 feet of front clearance)
-
Leave 24 inches of clear vertical space above the condenser, especially under overhangs or soffits
-
Check all model-specific airflow space needs before you finish planning the installation. Use guidelines that come from the equipment manufacturer, not generic rules
Shade helps because less direct sun means the condensing temperatures are lower and the energy use is reduced. The house itself, a tree line or a north-facing wall all provide shade without blocking airflow. But don't overdo it. No tight fenced boxes, garbage enclosures or bushes that block airflow. Think of proper airflow as a ring of clear air that surrounds the unit. The condenser needs to pull air in and push it out without anything in the way.
In Wisconsin's humid summers, good airflow around the condenser that has nothing in the way also lets it dry out faster after storms, which slows corrosion on the coil fins.
Sun, Heat and Direct Sunlight Exposure
Direct sunlight on the condenser all afternoon raises operating pressures and makes a mini split system work harder. Direct sun exposure can increase energy use by up to 10%, building up over thousands of hours of summer runtime. Position the unit to cut direct sun whenever possible. Placing a mini split near heat sources also increases energy use, so keep the condenser away from dryer vents, grill stations and other sources of excess heat.
There's a difference between brief morning sun and the peak sun from 1 to 4 p.m. on a south- or west-facing wall. Morning sun is something that dries dew off the unit. Afternoon sun heats the cabinet and surrounding air while the system is running the hardest. When I have a choice, I avoid south- and west-facing spots that have full sun.
Practical shading strategies:
-
Use existing building shade from the house's own shadow
-
Place units under roof overhangs that are the right size (maintaining top clearance per the manual)
-
Position near, but not inside, landscaping. A bush line five feet away breaks sun without blocking direct airflow
Snow, Ice and Cold-Climate Placement (Wisconsin-Specific)
Mitsubishi's MSZ-FX / MUZ-FX install manual says to install the outdoor unit where snowfall and blowing snow won't reach it, and in heavy-snow areas to add a canopy, a stand, and/or baffle boards. That guidance is something that applies to most of the Madison metro.
Common snow-related placement mistakes I see locally:
-
Units dropped on grade in a snow pile path on the north side, buried by January
-
Condensers under roof valleys that dump ice sheets onto the fan guard
-
Outdoor units in low spots that collect slush, freeze solid and block proper drainage (proper drainage is critical to prevent hazards from freezing water)
-
Protect the unit from falling debris and heavy snow buildup. A metal roof can send a slab of ice onto the condenser with enough force to bend fins
Good snow-minded placements: 16 to 24 inches above typical snow pile level on wall brackets or a steel stand, out from under roof edges, with clear access for shoveling but not right in the shoveling path. Avoid low spots that can collect water and cause flooding during spring melt.
In Madison and surrounding towns, a combo of a pad plus a steel stand or a high wall bracket works better than a low pad alone, especially on north sides where snow piles up. Mount the unit on a sturdy structure elevated above snow and moisture.
Noise, Neighbors and High Traffic Areas
Avoid installing the condenser in high traffic areas like narrow side yards used as walkways, right outside often used doors, or under decks where sound can echo in an enclosed space. Keep condensers away from bedroom windows (yours and your neighbor's) and shared fence lines. Sound reflects off hard surfaces like concrete and siding. Placing a unit in a tight corner between two walls makes the hum louder.
A solid, level surface underneath, quality vibration pads and proper line-set support all reduce rattles and low-frequency hum. If you're planning a mini split system, walk around your yard at night and think about where you like to sit, grill or relax before picking a condenser location.
Pad, Stand or Wall Bracket Mounting
Pads work well as a default for level ground with small snowfall. Install the outdoor unit on a level, stable surface. Composite or concrete pad materials hold up in Wisconsin's freeze-thaw cycles, but place them on compacted gravel for drainage and frost-heave resistance. Ensure a stable and level mounting surface to prevent compressor strain.
Stands elevate the condenser above snow, mulch beds or light flooding. I use stands in backyards where snow and leaves collect or in low-lying areas prone to pooling water. Steel stands rated for the unit's weight are the standard. Treated wood is sometimes used, but steel is close.
Wall brackets are a good choice for tight city lots, uneven ground or homes with small yards. They keep the condenser well above snow and ground moisture. Account for wall strength (mount into studs, not just siding), noise transfer into the structure, and clearances if the bracket sits under a deck or overhang. Larger rooms served by bigger outdoor units need brackets rated for more weight.
The best placement balances snow elevation, airflow, service access and line-set length. In my experience, most Madison installs end up on either a pad-plus-stand combo or a wall bracket, depending on the lot.
Line Length and Service Access
Stay within the manufacturer's max line-length and elevation limits. Most single-zone mini split units allow 50 to 100 feet of refrigerant line, but shorter is better. Route condensate drain lines to avoid pooling water near the foundation.
Leave room for service access:
-
There's at least two feet of working space in front of the access panel, service valves and electrical connections
-
Enough clearance to connect gauges, a micron gauge and a vacuum pump without twisting into awkward positions
-
Don't tuck condensers into tight spaces behind fences or shrubs where a tech can't reach the coil for cleaning
Neat line-set routing (short, gently sloped, supported and protected in line-hide along the exterior wall) is part of proper installation and should be planned at the same time you pick the condenser location. Electrical supply must comply with local codes and manufacturer's instructions.
Code, Permits and Wisconsin-Specific Rules
Condenser location is not just a comfort and efficiency decision. In Wisconsin it's also a code and permitting issue.
A registered HVAC contractor or HVAC qualifier may not start an install that requires a Wisconsin uniform building permit until the permit is issued, per SPS 305.70(4) and 305.71(6). That means condenser placement should be decided before paperwork is filed. Mini split units need a permit in most Wisconsin municipalities for mechanical work under the Uniform Dwelling Code.
Typical code and zoning constraints to check:
Because the federal 25C Energy Efficient Home Improvement Credit ended for property placed in service after December 31, 2025, a 2026 heat pump install in Wisconsin no longer gets that federal tax credit. Smart placement decisions that improve system efficiency matter more now that incentives aren't available to offset poor design.
Common Condenser Placement Mistakes to Avoid
-
Under deck joists with 12 inches of headroom. The condenser can't discharge warm air upward, heat backs up and high-pressure faults follow. Mini splits should not be placed in small, enclosed spaces.
-
Tight alleys between house and fence. Airflow chokes on both sides, coils ice up in winter, and service techs can't reach the valves. Don't obstruct airflow.
-
South-facing corners that bake all afternoon. System strain is spiking during peak cooling hours. Energy use goes up.
-
Downspouts that dump water onto the unit. Coil corrosion speeds up. In winter, ice forms on the fan guard.
-
Leaf-trap areas under trees that lose their leaves. Coils clog with debris every fall, reducing proper heat exchange. Avoid placing the unit near debris-prone areas.
-
Snow-slide zones under roof valleys or metal roofs. Ice slabs bend fan guards and damage coils.
-
Behind parking spots where cars idle. Hot exhaust raises intake air temperature and reduces efficiency. Improper placement in the wrong location creates problems that build up over years.
DIY vs. Pro Decisions
What I check before drilling or setting the pad: structural support for wall brackets, line-set paths through the exterior wall, compliance with clearances, snow patterns from prior winters, load calculations and electrical panel location. These details separate easy installation from a callback.
Once the location is chosen, technical steps are solidly pro territory. Mitsubishi's FX manual, for example, calls for a triple evacuation: pull to 4,000 microns and break with nitrogen to 0 psig, pull to 1,500 microns and break again, then pull to 500 microns. Daikin's RX/FTX (AXVJU) R-410A install manual only asks for the compound gauge to read -0.1 MPa with the pump running at least 10 minutes for lines up to 15 m and 15 minutes beyond that. That's far looser than a micron-gauge standard, which is why techs go by the gauge, not the clock. Proper operation is something that depends on getting this right.
Mini Split Condenser Placement FAQ
Can I install a mini split condenser under a deck?
Usually a bad idea unless the deck is very high and open on all sides. The condenser unit needs vertical and horizontal airflow, plus room for discharged air to rise and escape. I'd want at least 6 to 8 feet of clear space above and open sides with enough clearance to prevent recirculation. Under-deck locations in Wisconsin tend to stay damp and collect leaves, which accelerates corrosion and clogs coils. A condensate pump may be needed if drainage can't flow by gravity. For best performance and proper ventilation, keep the condenser out in the open.
How far from the house should a mini split condenser be?
Most condensers sit 4 to 12 inches off the wall on brackets or stands, or 6 to 12 inches behind on-grade pads. The key is following the manufacturer's minimum clearance on the rear and sides. Moving the unit a bit farther out is fine as long as the refrigerant line is supported and protected, but going too far increases line length and can reduce efficiency. Consider drip lines, siding maintenance and future repainting access when deciding the exact standoff distance. Install the unit away from walls or fences far enough to ensure airflow but close enough for a clean line-set run.
Can I put a mini split condenser in my garage or shed?
What happens if you put a condenser in an enclosed space? An enclosed condenser overheats the space, causes high-pressure faults and can damage components.
Condensers are designed to reject heat to the outdoors. Placing them in an enclosed garage, attic or shed violates most install manuals and destroys system efficiency. The desired temperature indoors will never be reached because the system can't exchange heat properly. Place the unit outside on the other side of the garage wall and route line sets through, preserving proper ventilation and clearances.
Is a roof mount a good place to install a mini split condenser?
Roof mounting is sometimes used on flat commercial roofs or crowded lots, but it introduces wind exposure, service access problems and roof-penetration risks. In snowy climates like Madison, roof mounts must deal with drifting snow, ice slide and safe ladder access for service. For most residential installs, a ground-level or wall-mounted location gives better service access and fewer complications. Involve an HVAC pro and possibly a roofer if you're seriously considering a roof-mounted mini split condenser unit.
What if I already installed the condenser in a bad spot?
Relocation is possible but involves recovering refrigerant, moving line sets and electrical, and re-doing vacuum and charging procedures. That's a professional job. Before committing to a full move, try stopgap improvements: trim shrubs to restore air distribution, add a code-compliant shade structure, redirect downspouts away from the unit, or raise it on a stand to clear snow and improve conditions. Have a local HVAC tech look at whether the existing placement is costing enough in energy use or reliability to justify the expense of relocation.